
HO Scale Lumber Bundles
Everything here is intended for personal, non-commercial use. If you have any questions or need assistance, please contact me at milepost15@gmail.com. I’d especially like to know your printer model, resin type and print settings and how well they worked. A photo of the completed model and permission to use it on this page would be welcome as well.


These bundles represent unwrapped lumber loads and can be printed on any SLA resin printer. They feature individual board detail on both sides, the top and one end. The remaining end is smooth and the bottom is open with a rabbet cut into it to accommodate an optional bottom plate that can be cut out of styrene with a Silhouette Cameo or Cricut Maker. You can refer to this post for finishing recommendations.
- 2 ft. high bundles (5 rows per centerbeam) – Each archive contains an .stl file for the bundle itself, a .dxf file for the optional base and an info.txt file with instructions.
To complete the bundles as per the prototype you will need to purchase the following from your favorite hobby retailer:
– Northeastern Scale Lumber – HO 2″ x 4″ – 11″ Length Scale Lumber (HOSCAL2411) – For the risers banded under each bundle.
– Berkshire Junction – “Fine” EZ Line – Green (for some bundle bands) and black (for other bands and centerbeam tie-downs).
– Chartpak – 1/32″ Matte Graphic Tape (BG3101M) – For simulating edge protectors on loaded centerbeam cars.
- PaintStencils – These are .studio3 files that can be opened in Silhouette Studio and cut out on Oracal 631 Removable Vinyl using a Silhouette Cameo. Included with the download is a .txt file with the cut settings that I found worked best for my Cameo 4 with an Autoblade.
- Western Forest Products (WFP) – For 2×8’s in 2 ft. high by 10,12,14,16,18 and 20 ft. lengths. I found that a 50/50 mix of Tru-Color Cascade Green and BNSF Green was a good approximation of the green WFP uses.
Mounting Board for Testing and Programming Equipment
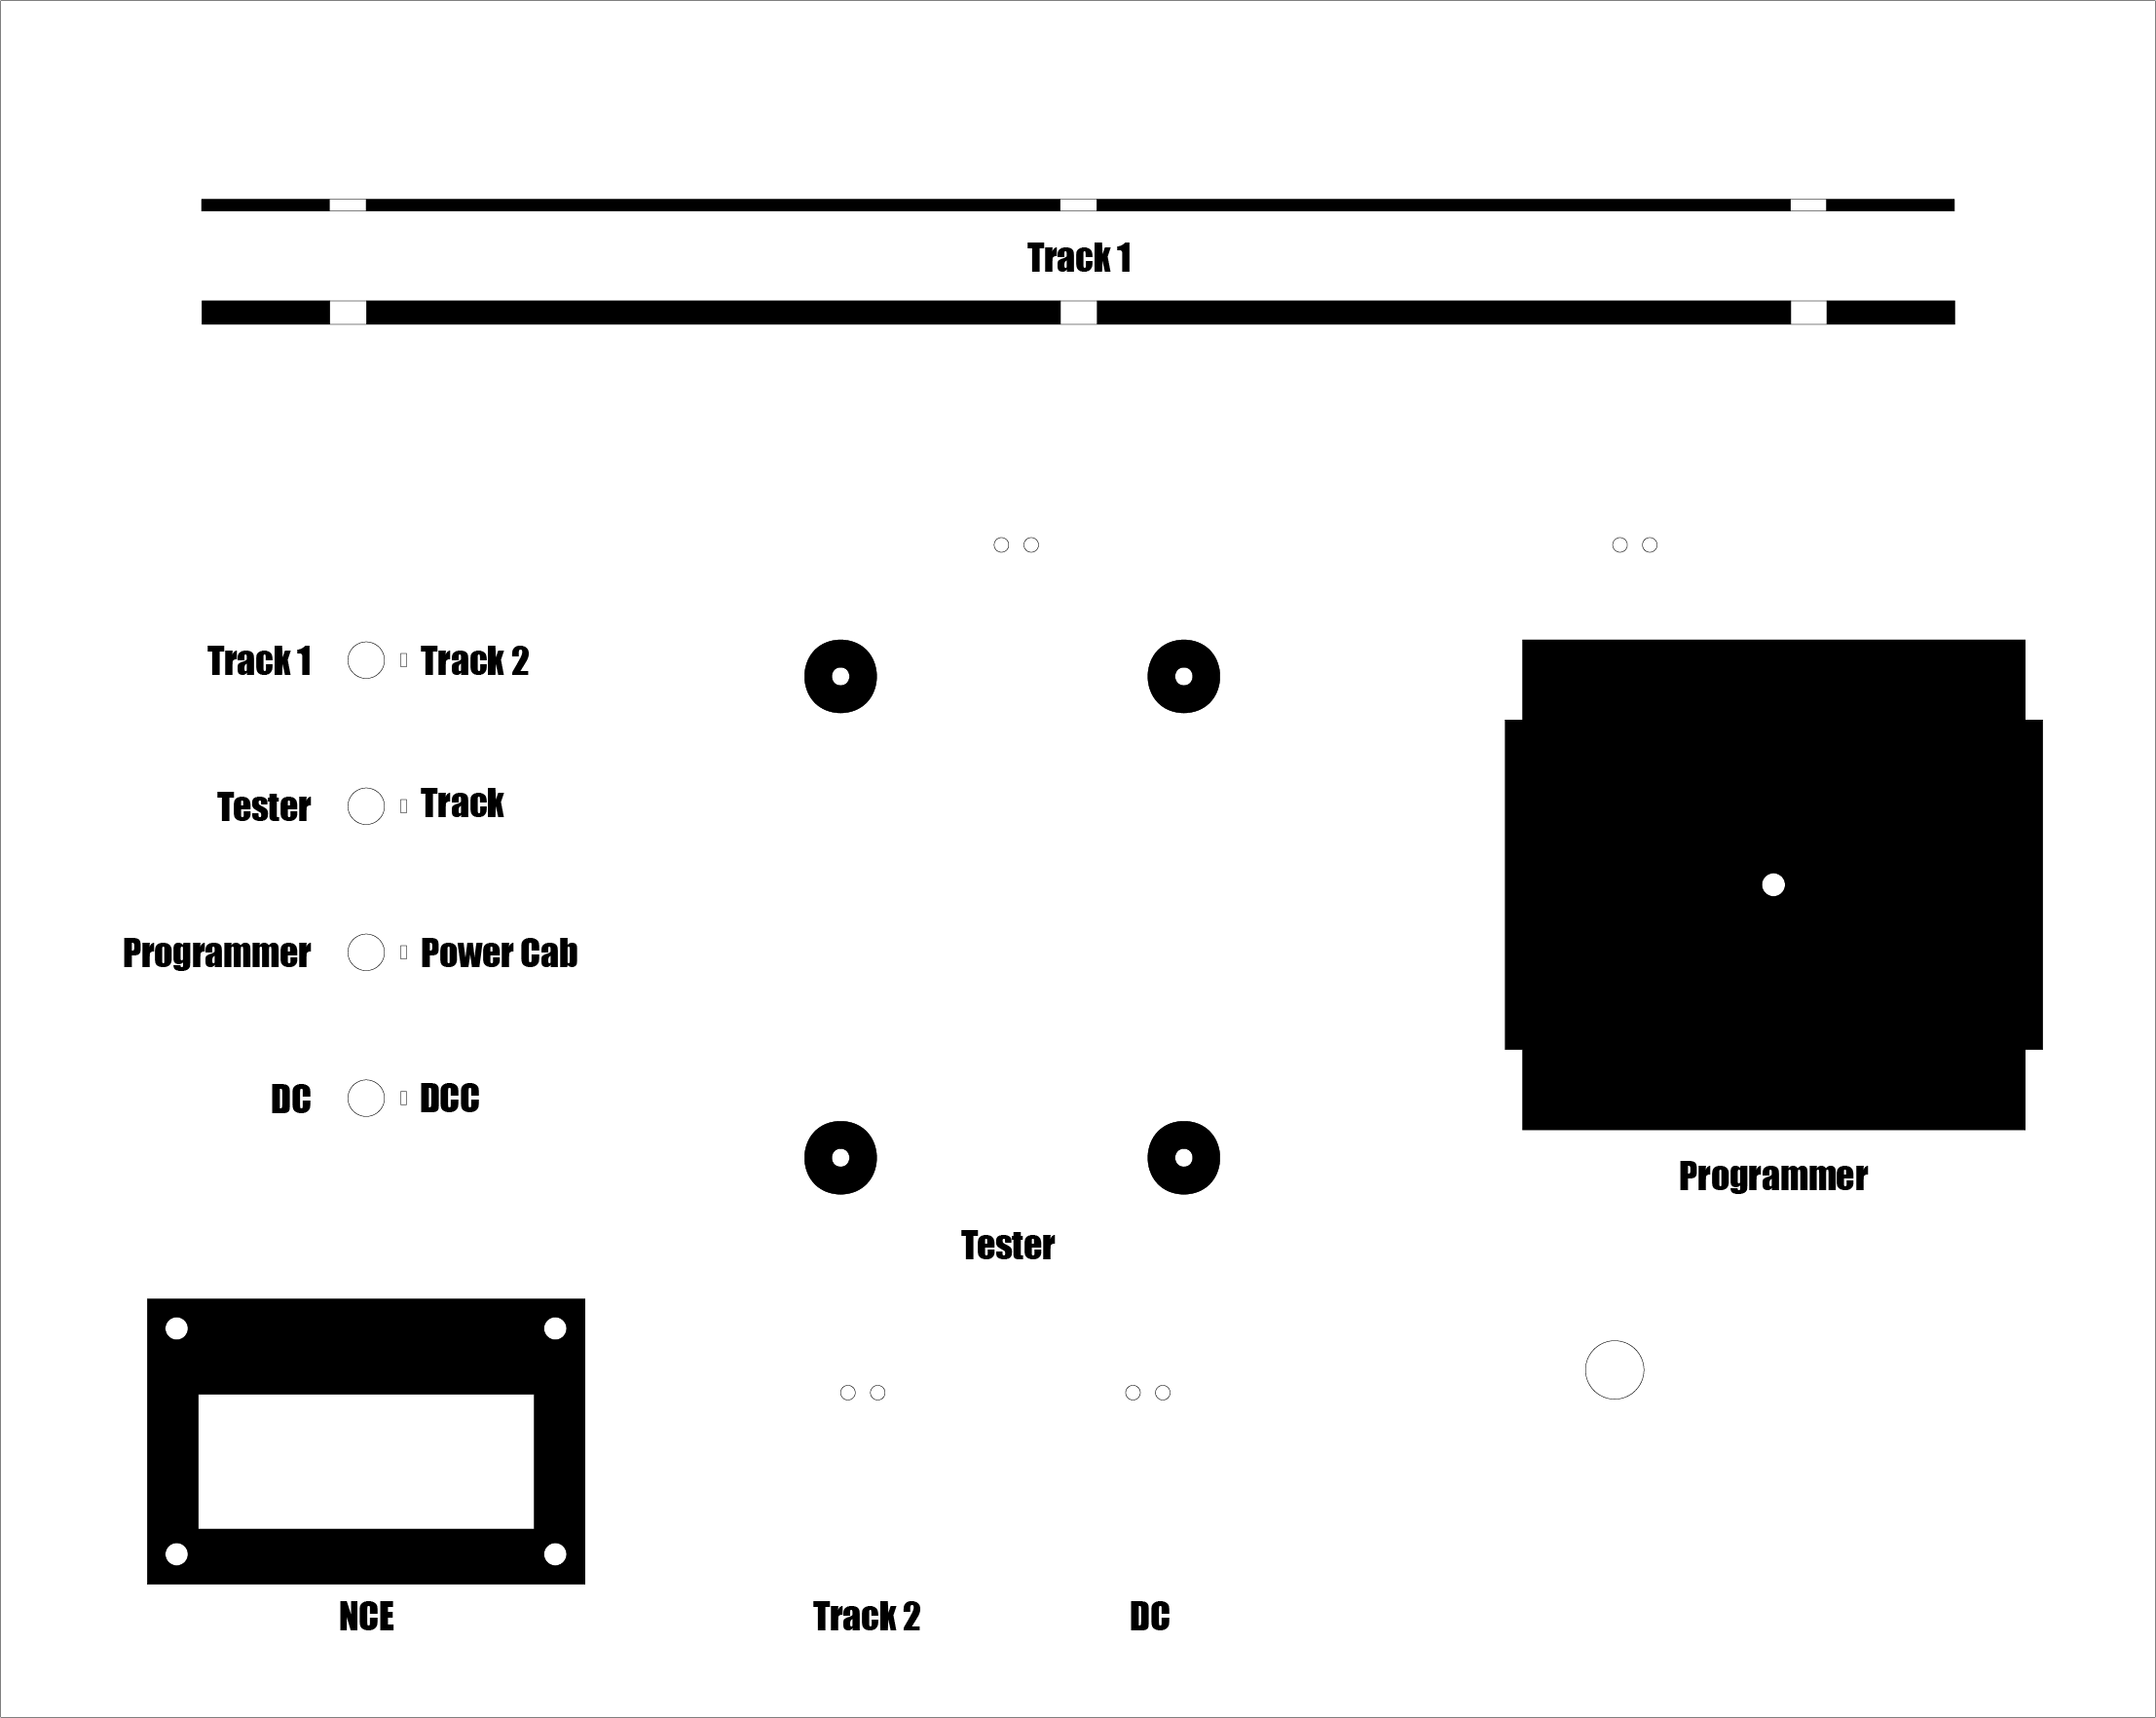


I built the box in the photos as a way to mount my LokProgrammer, Decoder Tester and NCE Powercab system such that each would be readily accessible and all wiring would be contained and out of the way. It also features an input for a DC controller. It works really well and can even power a small layout or module. The actual mounting board was cut and etched with a laser from 1/4″ plywood and the box and frame were built from poplar that I stained. If you’d like to build one of your own you can download the Illustrator files for the mounting board below. The file is ready to be cut but you’re welcome to modify it as necessary to meet your needs. I had mine done by Matt at Shortline CAD. If you don’t have access to a laser cutter, I highly recommend his services. Click below to download the .zip archive. You will need a relatively recent version of Adobe Illustrator to open the artwork:
– Mounting Board for DC/DCC Testing and Programming Equipment (2.65mb)
I didn’t draw up any formal plans for the box. It was mostly just scribbled on random pieces of scratch paper. If anyone is interested in having more info send an email to milepost15@gmail.com and I’ll send you a materials list and try to digitize the wiring diagram.
